


Set drip pipe extrusion temperature by choosing a material-based starting window, mapping that window to each heated zone, and then adjusting only from controlled trial results. A copied temperature profile can create poor plasticization at the low end or degradation and unstable extrusion at the high end.
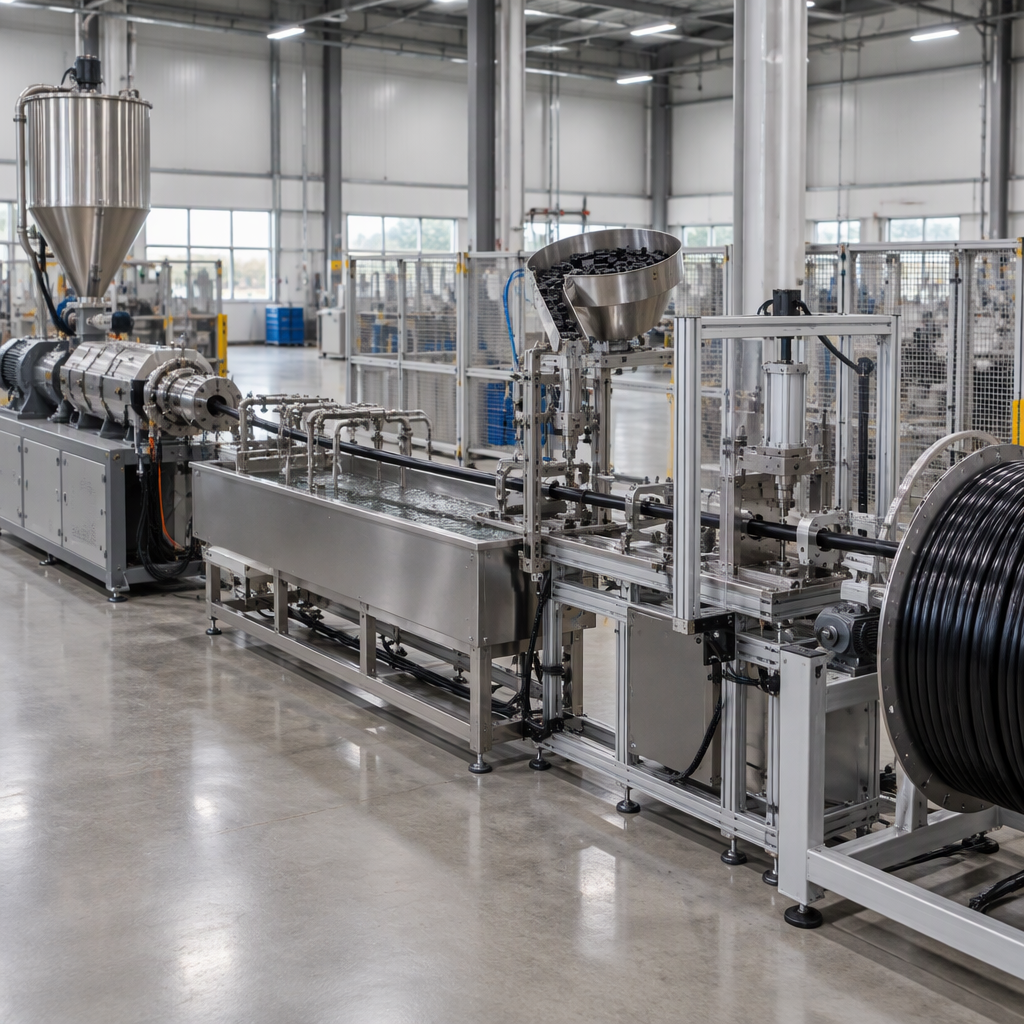
Start with the material, not a copied temperature recipe
The first drip pipe extrusion temperature setting should come from the resin family, supplier guidance, and the line’s own trial behavior, because controlled heating and melting are central to plastic pipe extrusion.
Use the material as the baseline because the same machine can behave differently with HDPE, LDPE, LLDPE blends, black masterbatch, recycled content, and different pipe wall targets. The extruder’s barrel zones are adjusted independently, so the buyer should think in ranges and trial response rather than one universal number.
| Material reference | Useful starting information | How to use it in drip pipe trials |
|---|---|---|
| PE-HD pipe/profile extrusion guide | General cylinder and melt temperature ranges are stated as 180–205°C. | Use only as a broad starting reference; confirm the exact grade with the resin supplier and machinery representative. |
| PE-LD pipe/profile extrusion guide | General cylinder temperature is stated as 170–200°C, with melt temperature stated as 180–210°C. | Use only as a broad starting reference; do not assume the same range fits every drip pipe formulation. |
| Round-emitter drip pipe material scope | HDPE or high-grade LLDPE blends may be processed for thicker-wall round pipe. | Match the starting profile to the selected pipe structure, dripper type, and trial record rather than to the polymer name alone. |
Map temperature settings to the whole drip pipe line
A temperature change should be judged against the complete drip pipe line, not only the barrel display, because extrusion is followed by sizing, cooling, dripper insertion, punching, haul-off, and coiling in round-emitter pipe production.
- Set each barrel zone as a controlled heating point rather than one single machine temperature.
- Confirm whether the melt is plasticized enough for stable extrusion before increasing output expectations.
- Watch the transition from extrusion into vacuum sizing and cooling, because pipe shape and wall stability are affected after the melt leaves the die.
- Check the dripper insertion, post-insertion cooling, punching or inspection, haul-off, and coiling stages before accepting the profile as production-ready.
For an embedded round dripper pipe line, the product-page scope includes plastic extrusion, dripper sorting and conveying, thermal lamination, vacuum forming and cooling, punching, and winding in one line. That is why the temperature profile should be evaluated together with downstream operations, not isolated from them.
Use trial results to tune the temperature window
Trial results should move the temperature window gradually: low-temperature symptoms point toward insufficient plasticization, while high-temperature symptoms raise the risk of thermal degradation or unstable extrusion.
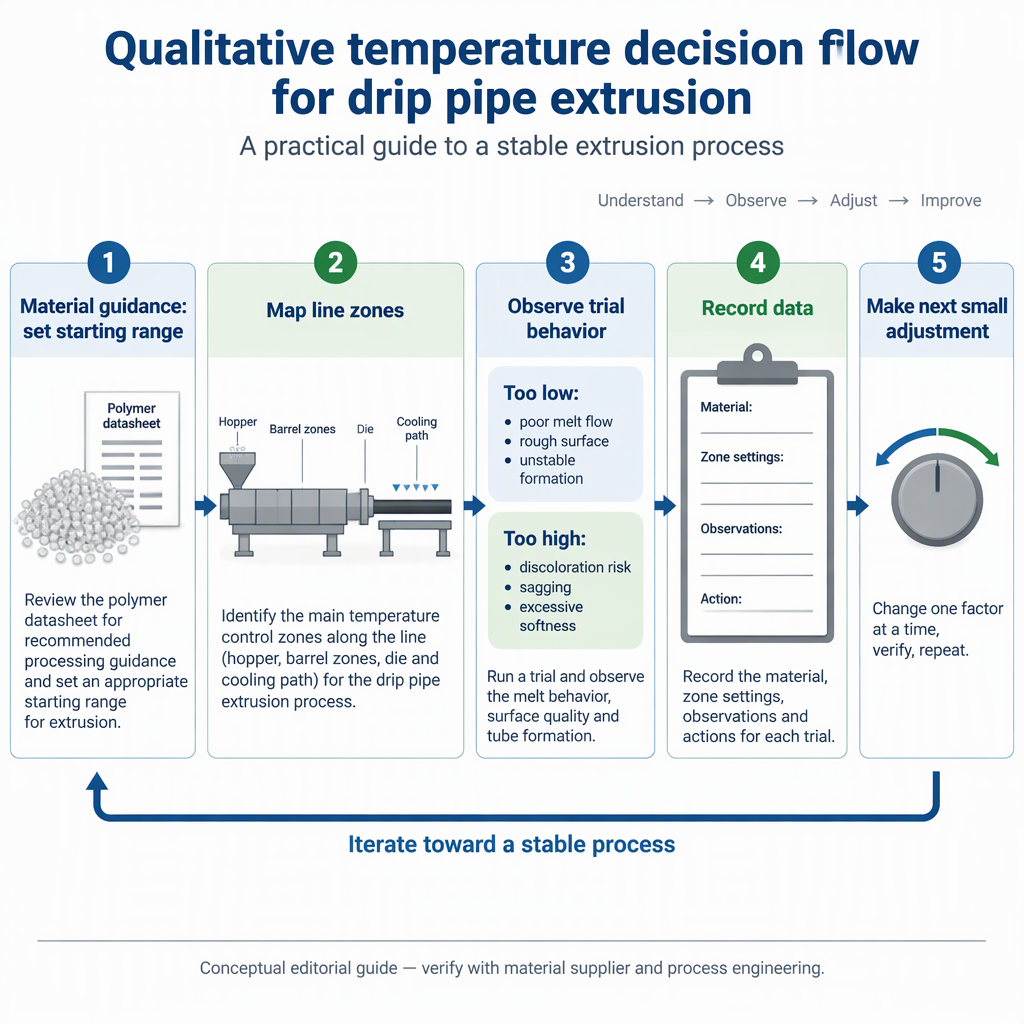
- Begin inside the material-based reference range, then hold line speed, screw speed, cooling water, and haul-off conditions as steady as possible during the comparison.
- Change one temperature area at a time so the trial result can be connected to the adjustment.
- Evaluate the pipe after cooling, dripper insertion, punching, haul-off, and coiling instead of accepting the melt appearance alone.
- If manual access to the die area, punching unit, cutter, dripper insertion area, or any guarded moving section is needed, switch off and disconnect the applicable power source first, then follow only the model manual’s permitted access procedure.
| Trial signal | Likely temperature direction to investigate | Buyer action |
|---|---|---|
| Melt or pipe behavior suggests insufficient plasticization. | Temperature may be too low for the current material and output condition. | Review barrel-zone settings, material dryness or contamination, screw speed, and the supplier’s resin guidance before raising the relevant zone gradually. |
| Extrusion becomes unstable or the material shows heat-stress behavior. | Temperature may be too high for the current material and residence time. | Reduce the suspected zone gradually and check whether speed, pressure, cooling, and die condition are contributing. |
| Pipe looks acceptable at the die but fails after insertion, punching, haul-off, or coiling. | The issue may not be solved by barrel temperature alone. | Check downstream cooling, sizing, insertion timing, punching quality, traction, and winding tension before changing the whole temperature profile. |
Record trial data before changing the setpoint
Before changing the setpoint, record the material, zone settings, melt behavior, cooling condition, line speed, and finished pipe observations so the next adjustment is based on evidence rather than memory.
- Material name, grade, batch, masterbatch percentage, recycled-content decision, and supplier processing notes.
- Set temperature and actual temperature for each barrel zone, adapter, screen pack area, die, and any heated tooling used on the line.
- Screw speed, line speed, motor load, die pressure if available, and any visible signs of poor plasticization or unstable flow.
- Vacuum sizing, cooling, dripper insertion, punching or inspection, haul-off, and coiling observations.
- Finished pipe checks such as wall uniformity, shape stability, hole quality, dripper position, and whether the pipe remains stable through coiling.
A useful trial sheet should separate observed facts from the operator’s adjustment decision. That makes it easier to compare two resin batches, two wall structures, or two temperature profiles without relying on a single visual impression.
Check the irrigation limits after the extrusion trial
The final temperature decision should also protect irrigation use: drip systems rely on small-diameter plastic pipes fitted with emitters, and emitter blockage is a practical risk in the irrigation context.
Because pipe extrusion depends on controlled heating, melting, extrusion, cooling, and sizing, the acceptable temperature window is the one that supports both stable processing and the downstream irrigation requirements selected by the buyer.
Prepare RFQ data for a process discussion
Before asking a supplier for a temperature recommendation, prepare the pipe design, material package, line configuration, and trial record so the discussion is about your application instead of a generic recipe.
- Pipe type: round-emitter pipe, wall target, diameter target, dripper insertion approach, punching requirement, and coiling requirement.
- Material package: HDPE, LDPE, LLDPE blend, masterbatch, additives, recycled-content decision, and current supplier processing guidance.
- Line scope: extrusion, dripper sorting and conveying, thermal lamination where used, vacuum forming and cooling, punching, and winding.
- Temperature record: zone setpoints, actual readings, melt behavior, output condition, and any symptom tied to low or high temperature.
- Trial result: pipe shape after cooling, dripper insertion result, hole quality, haul-off stability, and coiling result.
Conclusion
The lowest-risk path is to start from the material guidance, adjust the heated zones gradually, and accept a drip pipe extrusion temperature only after the full line trial supports the result.
- HDPE guidance can provide a broad starting reference, but it is not a universal drip pipe setting.
- LDPE guidance may show a different reference window, so HDPE and LDPE should not be treated as identical.
- A temperature profile must work through cooling, dripper insertion, punching, haul-off, and coiling, not only at the die.
For buyers, the practical decision is not “which copied temperature is correct,” but “which documented trial window gives stable extrusion and acceptable pipe results for this material, product, and line configuration.”
FAQs about drip pipe extrusion temperature
Most buyer questions come down to material differences, trial discipline, and whether the finished pipe still meets the intended irrigation use after the extrusion run.
Are HDPE and LDPE extrusion temperatures the same?
No. General PE-HD pipe/profile guidance gives 180–205°C for cylinder and melt temperature, while general PE-LD guidance gives 170–200°C for cylinder temperature and 180–210°C for melt temperature. Use the exact resin supplier’s recommendation and your own trial result before production.
Can one temperature profile fit every drip pipe line?
No. Extrusion uses independently adjusted barrel temperature zones, and too-low or too-high temperature creates different process risks, so the profile must be tested with the actual material and line condition.
What happens if the drip pipe extrusion temperature is too low?
Too-low temperature can prevent sufficient plasticization. In a trial, investigate plasticization, pressure, melt uniformity, and downstream pipe stability before increasing output or accepting the setting.
What happens if the temperature is too high?
Too-high temperature can cause thermal degradation or unstable extrusion. If those signs appear, reduce the suspected zone gradually and check residence time, speed, and downstream cooling conditions.
Why check dripper insertion and punching after changing temperature?
Round-emitter drip pipe production includes extrusion, vacuum sizing and cooling, dripper insertion, punching or inspection, haul-off, and coiling, so a setting that looks acceptable at the die still has to work through the downstream process.
Why does irrigation use matter when setting extrusion temperature?
Drip irrigation uses small-diameter plastic pipes with emitters or drippers, and emitter blockage is a practical risk. Temperature selection therefore has to support pipe quality, hole quality, and emitter-related requirements, not only melt flow.
What should be included in an RFQ for temperature process advice?
Include material grade, pipe size target, dripper type, line scope, zone setpoints, trial symptoms, cooling condition, punching result, haul-off result, and coiling result. A line that combines extrusion, dripper handling, forming/cooling, punching, and winding needs process advice based on the whole configuration.
